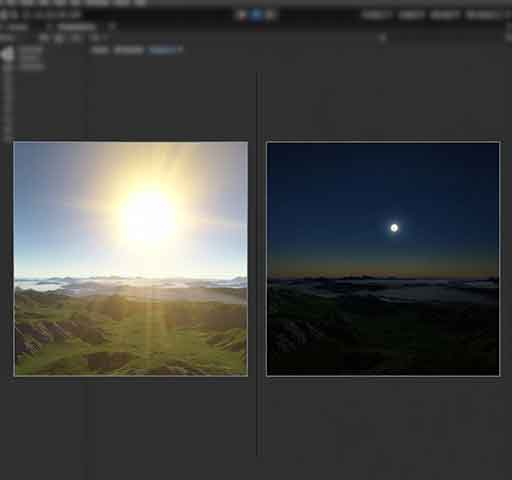
A day and night cycle can dramatically improve the atmosphere and immersion of your Unity game. It involves smoothly transitioning lighting, sky colors, and sometimes environmental effects over time to simulate real-world day/night behavior.
Below is a step-by-step guide for creating a flexible and efficient day-night system in Unity.
Step 1: Setup the Scene
Start with a basic 3D scene containing:
A Terrain or environment
A Directional Light (this will act as the Sun)
A Skybox material
Optional: Additional lights for lamps, indoor lighting, or ambient effects
Rename your Directional Light to Sun to keep things organized.
Step 2: Configure the Sun
Set the Directional Light as follows:
Type: Directional
Shadow Type: Soft Shadows (optional)
Intensity: Start with 1 (we will animate it)
Rotation: Set an initial angle that represents morning (e.g., X=50, Y=0, Z=0)
Later, we’ll rotate this light to simulate the sun moving across the sky.
Step 3: Create the DayNightCycle Script
Create a new C# script named DayNightCycle.cs and attach it to an empty GameObject called DayNightController.
This script will rotate the sun, adjust intensity, and optionally change ambient lighting.
using UnityEngine;

public class DayNightCycle : MonoBehaviour
{
    [Header("Sun Settings")]
    public Light sun; // Assign your directional light
    public float dayDuration = 120f; // Total seconds for a full day
    public float maxIntensity = 1f;
    public float minIntensity = 0f;

    [Header("Sky Settings")]
    public Material skyboxMaterial;
    public Color daySkyColor = Color.cyan;
    public Color nightSkyColor = Color.black;

    private float time = 0f;

    void Update()
    {
        // Increment time
        time += Time.deltaTime;
        if (time > dayDuration) time = 0f;

        // Calculate normalized time (0-1)
        float t = time / dayDuration;

        // Rotate sun
        sun.transform.localRotation = Quaternion.Euler((t * 360f) - 90f, 170f, 0f);

        // Adjust sun intensity
        if (t < 0.25f) // Morning
            sun.intensity = Mathf.Lerp(minIntensity, maxIntensity, t / 0.25f);
        else if (t < 0.75f) // Day
            sun.intensity = maxIntensity;
        else // Evening
            sun.intensity = Mathf.Lerp(maxIntensity, minIntensity, (t - 0.75f) / 0.25f);

        // Adjust skybox color
        if (skyboxMaterial != null)
            skyboxMaterial.SetColor("_Tint", Color.Lerp(nightSkyColor, daySkyColor, sun.intensity / maxIntensity));
    }
}
Step 4: Assign References
Drag your Directional Light into the Sun field
Assign the Skybox material if you want color transitions
Adjust dayDuration to control how fast the day-night cycle is
Step 5: Configure Skybox
If you want smoother transitions:
Create a procedural skybox or HDRI Skybox
Animate exposure or tint using the DayNightCycle script
Optional: Use Gradient Skyboxes for color blending
Step 6: Add Ambient Lighting
For more realism, adjust ambient light via RenderSettings:
Update the cycle every frame, but consider reducing Skybox updates if performance drops
Use lightweight shaders for night-time lights
Limit shadows for mobile if needed
Use baked lighting for static objects to reduce runtime costs
Step 10: Testing
Run the scene and observe:
The sun rotates smoothly
Lighting intensity changes realistically
Skybox and ambient lighting respond correctly
Optional effects like moon and stars appear at night
Advanced Enhancements
Add a UI clock to show in-game time
Blend cloud textures over the skybox
Sync NPC schedules to the time of day
Integrate with shaders for wet surfaces at night or day
Use animation curves for smooth light intensity transitions
Final Thoughts
A day-night cycle in Unity is a combination of light rotation, intensity control, and environmental adjustments. With a simple script, you can create an immersive world that reacts realistically over time. Once implemented, you can expand with weather, moon, stars, and gameplay effects for full dynamic realism.




![There’s something satisfying about watching a flat, boring plane turn into a mountain range. That’s exactly what a height map does in Unity. With a simple grayscale image, you can shape landscapes, add depth to materials, and create worlds that feel real instead of flat. It’s one of those tools that looks technical at first, but once you understand it, it becomes surprisingly simple and powerful. In this guide, we’ll break down what a height map is, how it works in Unity, how to use it for terrain, how it differs from normal maps, and how to control it with C#. What Is a Height Map? A height map is a grayscale image where each pixel represents elevation. Black = lowest height White = highest height Gray = values in between Think of it like a topographic map, but simplified into brightness levels. Unity reads this image and uses the brightness values to push parts of a surface up or down. The result? Hills, valleys, cliffs, and surface details created from a simple image. Height Maps in Unity Terrain The most common use of height maps in Unity is terrain generation. Unity’s Terrain system allows you to import a height map and automatically generate a 3D landscape from it. How to Import a Height Map into Terrain Create a Terrain: GameObject → 3D Object → Terrain Select the Terrain object. Open the Terrain Inspector. Choose Import Raw under the heightmap settings. Select your grayscale RAW file. Once imported, Unity converts the grayscale values into elevation data. If your height map is smooth, you’ll get rolling hills. If it has sharp contrast, you’ll get steep cliffs. Height Map Resolution Matters Resolution affects how detailed your terrain will be. A low-resolution height map creates blocky terrain. A high-resolution height map creates smoother, more detailed landscapes. However, higher resolution also increases memory usage and processing cost. If you're building for mobile, balance detail with performance. Height Maps vs Normal Maps This is where many beginners get confused. Height Map Actually changes geometry (in terrain or displacement). Creates real depth. More performance cost if geometry changes. Normal Map Does NOT change geometry. Fakes lighting to simulate bumps. Much cheaper performance-wise. If you need real terrain shape, use a height map. If you just want surface detail like cracks or scratches, a normal map is usually better. Using Height Maps in Materials (Parallax & Displacement) Height maps are not limited to terrain. You can also use them in materials. In Unity’s Standard Shader (or URP/HDRP equivalents), height maps can be used for: Parallax Mapping – creates depth illusion without changing geometry. Displacement Mapping – actually modifies mesh vertices (HDRP). For example, if you apply a brick texture, adding a height map can make the mortar appear recessed and bricks raised. Creating Height Maps You can create height maps using: Photoshop or GIMP (grayscale images) Blender (baked displacement maps) World Machine or Gaea (terrain generation tools) Procedural generation with code The key is keeping it grayscale and avoiding compression artifacts. Generating a Height Map with Code You can also generate terrain procedurally using Perlin Noise. This is common in open-world or survival games. Here’s a simple example: [csharp] using UnityEngine; public class TerrainGenerator : MonoBehaviour { public Terrain terrain; public int depth = 20; public int width = 256; public int height = 256; public float scale = 20f; void Start() { terrain.terrainData = GenerateTerrain(terrain.terrainData); } TerrainData GenerateTerrain(TerrainData terrainData) { terrainData.heightmapResolution = width + 1; terrainData.size = new Vector3(width, depth, height); terrainData.SetHeights(0, 0, GenerateHeights()); return terrainData; } float[,] GenerateHeights() { float[,] heights = new float[width, height]; for (int x = 0; x < width; x++) { for (int y = 0; y < height; y++) { heights[x, y] = Mathf.PerlinNoise(x / scale, y / scale); } } return heights; } } [/csharp] This script generates a terrain using Perlin Noise, which creates natural-looking hills and variation. Controlling Height Strength Sometimes height maps look too extreme. Other times they look flat. In terrain settings, you can adjust: Terrain height (Y scale) Brush strength (when sculpting manually) In materials, you can adjust height intensity inside the shader settings. Small adjustments make a big difference. Subtle depth often looks more realistic than exaggerated displacement. Common Problems and Fixes Terrain Looks Blocky Increase heightmap resolution or smooth the terrain. Edges Look Stretched Make sure your height map is square and uses proper dimensions (like 512x512 or 1024x1024). Lighting Looks Strange Check your normal settings and ensure lighting is baked or set correctly. When to Use Height Maps Use height maps when: You need large landscapes. You want realistic terrain shaping. You’re building procedural worlds. You need true geometric depth. Skip them when: You only need small surface detail. Performance is extremely limited. Final Thoughts Height maps are one of those tools that feel technical at first, but once you use them, they become creative tools. You’re not just editing numbers. You’re sculpting mountains. Carving valleys. Designing the shape of a world. Start simple. Import a grayscale image. Adjust the scale. Play with noise. Watch how small changes affect the landscape. Once you understand height maps, Unity stops feeling like a flat engine. It starts feeling like a world builder.](https://unityqueen.com/wp-content/uploads/2026/02/Lighting-in-Unity-150x150.jpg "Lighting in Unity: A Practical Guide for Game Developers")