Audio Ducking Systems in Unity

Dolly Track Customization in Unity
February 24, 2026
Finite State Machines for AI in Unity
February 25, 2026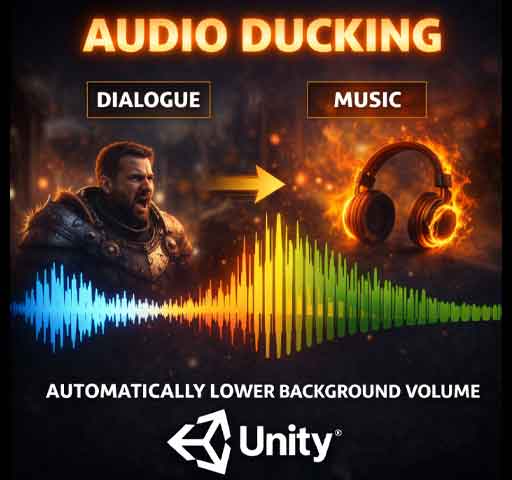
Ever notice how the music fades slightly when a character starts talking in a game? Or how background ambience lowers during an explosion so the impact feels stronger?
That’s audio ducking.
It’s a simple idea: automatically lower the volume of one sound when another important sound plays. When done right, it makes your audio mix feel clean, professional, and intentional.
In this guide, we’ll break down what audio ducking is, why it matters, and how to build a flexible ducking system in Unity.
What Is Audio Ducking?
Audio ducking is a technique where one audio source reduces its volume temporarily when another audio source becomes active.
Common examples:
- Background music lowers during dialogue
- Ambient sound dips during UI notifications
- All sounds reduce slightly during slow-motion effects
The key idea is priority. Important sounds get space. Everything else steps back.
Why Audio Ducking Matters
Without ducking, sounds compete with each other. Dialogue can get buried under music. Important effects can feel weak.
With ducking:
- Dialogue becomes clear
- Explosions feel powerful
- Audio mix feels controlled
- Players don’t need to adjust volume constantly
It’s one of those subtle systems that players don’t notice directly, but they feel the difference.
Using Unity’s Audio Mixer for Ducking
The best way to implement ducking in Unity is through the Audio Mixer.
Step 1: Create an Audio Mixer
- Right-click in Project window
- Create → Audio → Audio Mixer
- Name it something like “MainMixer”
Step 2: Create Mixer Groups
Create separate groups for:
- Music
- Dialogue
- SFX
- Ambience
Assign each AudioSource to the correct group.
Step 3: Add a Ducking Effect
Select the group you want to be lowered (for example, Music).
Add a Compressor effect.
Enable Sidechain and set it to listen to the Dialogue group.
Now, whenever dialogue plays, the compressor reduces music volume automatically.
This method is clean, efficient, and professional.
Manual Ducking with C# (Script-Based)
If you want more control, you can build a custom ducking system using code.
Basic idea:
- Store original volume
- Lower it smoothly
- Restore it after the important sound ends
Simple Ducking Script
using UnityEngine;
using System.Collections;

public class AudioDucker : MonoBehaviour
{
    public AudioSource musicSource;
    public float duckVolume = 0.3f;
    public float fadeSpeed = 2f;

    private float originalVolume;

    void Start()
    {
        originalVolume = musicSource.volume;
    }

    public void StartDucking(float duration)
    {
        StopAllCoroutines();
        StartCoroutine(DuckRoutine(duration));
    }

    IEnumerator DuckRoutine(float duration)
    {
        // Fade down
        while (musicSource.volume > duckVolume)
        {
            musicSource.volume -= Time.deltaTime * fadeSpeed;
            yield return null;
        }

        yield return new WaitForSeconds(duration);

        // Fade up
        while (musicSource.volume < originalVolume)
        {
            musicSource.volume += Time.deltaTime * fadeSpeed;
            yield return null;
        }

        musicSource.volume = originalVolume;
    }
}
Call it like this when dialogue starts:
audioDucker.StartDucking(2f);
This lowers music for 2 seconds, then restores it smoothly.
Advanced Ducking with Multiple Layers
In larger games, you may need layered ducking:
- Dialogue ducks music
- Explosions duck everything slightly
- Pause menu ducks all gameplay audio
To handle this, avoid directly changing AudioSource volume. Instead, control exposed Audio Mixer parameters.
Exposing Volume Parameter
- Open Audio Mixer
- Right-click volume fader
- Select “Expose to script”
- Name it (example: MusicVolume)
Control with Code
using UnityEngine;
using UnityEngine.Audio;

public class MixerDucker : MonoBehaviour
{
    public AudioMixer mixer;

    public void SetMusicVolume(float volume)
    {
        mixer.SetFloat("MusicVolume", volume);
    }
}
This gives you centralized control and avoids conflicts between systems.
Smooth Fading Is Critical
Never instantly drop volume. It feels unnatural.
Use:
- Coroutines
- Lerp functions
- Animation curves
- Audio Mixer transitions
Even a 0.2-second fade makes a big difference.
Balancing Ducking Levels
How much should you reduce volume?
- Dialogue ducking: 40–60% reduction
- Explosions: 20–40% reduction
- UI notifications: 15–30% reduction
Too much ducking feels dramatic. Too little feels pointless. Test with real gameplay.
Performance Considerations
Audio ducking is lightweight, but follow good practice:
- Cache references
- Avoid frequent StopAllCoroutines if unnecessary
- Use Audio Mixer for large systems
- Test on low-end devices
Most performance cost comes from too many active AudioSources, not ducking itself.
Common Mistakes
- Stacking multiple ducking systems accidentally
- Forgetting to restore original volume
- Over-ducking everything
- Ignoring fade timing
Keep it controlled and predictable.
When to Use Audio Ducking
Use ducking when clarity matters.
- Story-driven games
- Dialogue-heavy RPGs
- Competitive multiplayer games
- Games with layered sound design
If your game relies heavily on atmosphere and music, ducking becomes essential.
Final Thoughts
Audio ducking is about focus.
It tells the player, “This sound matters more right now.”
Whether you use Unity’s Audio Mixer sidechain compression or build a custom script-based solution, the principle stays the same: give important sounds space.
Keep fades smooth. Keep levels balanced. Test with headphones and speakers.
When mixed properly, your game won’t just look professional. It’ll sound professional too.